Pixel, Samsung 및 기타 Android 폰에 여행용 eSIM을 QR 코드로 설치하고 듀얼 SIM 데이터 팁을 포함합니다.

검수 · Device compatibility & installation
업데이트 2026-09-13
3 steps · about 2 minutes on Wi‑Fi
Good to know
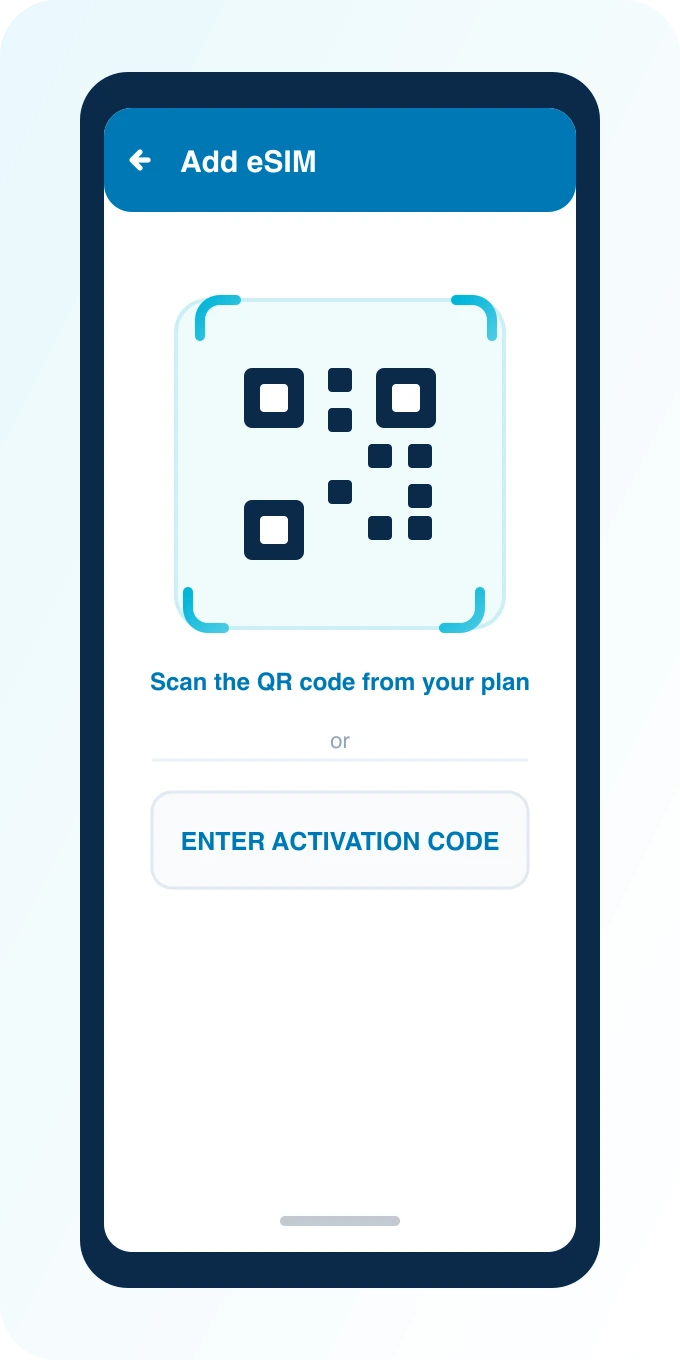
Settings → Network & internet → SIMs (Pixel) or Connections → SIM manager (Samsung) → Add eSIM → Scan QR code.
No QR handy? Use Enter Activation Code below.
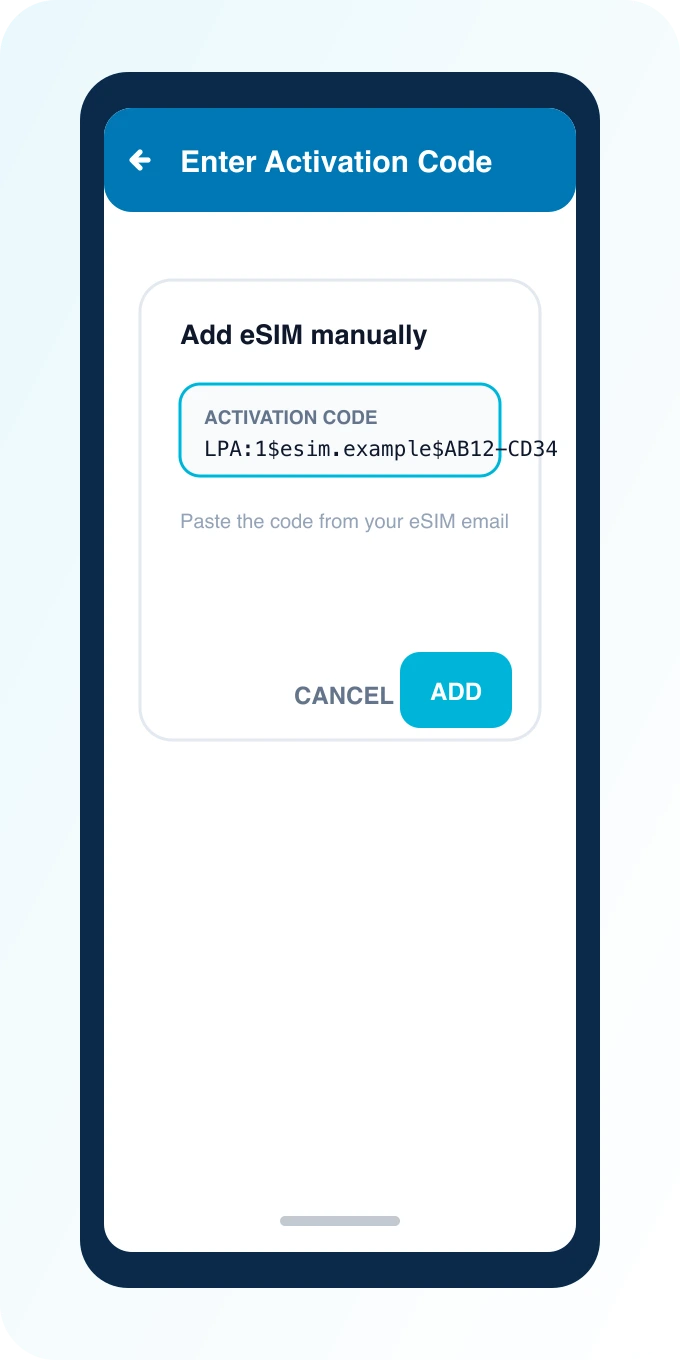
Tap Enter Activation Code and paste the code from your dashboard.
The code is on the same email as your QR, in the LPA:1$… format.
Confirm the download, name the plan, then switch the eSIM on.
Keep your physical SIM enabled for calls and SMS.
Installing a travel eSIM on Android means adding a mobile plan via QR code under Settings → Network & internet → SIMs (Pixel) or Connections → SIM manager (Samsung), then setting the eSIM as the preferred data line. Menus vary by OEM and Android version, but the QR from PingRoam is the same. Install on Wi‑Fi before you travel when possible.
Android에 여행용 eSIM을 설치한다는 것은 QR 코드를 통해 모바일 플랜을 설정하는 과정으로, Pixel은 Settings → Network & internet → SIMs, Samsung은 Connections → SIM manager 메뉴에서 수행됩니다. OEM과 Android 버전에 따라 메뉴 명칭이 다를 수 있지만, PingRoam의 QR 코드는 동일합니다. 가능한 경우 여행 전 Wi‑Fi 환경에서 설치하세요. 이 과정을 통해 데이터 로밍 비용을 절감하고, 도착 후 즉시 인터넷에 접속할 수 있습니다.
An eSIM-capable Android phone (many Pixel, Samsung Galaxy S/Z, Google, and other flagships — not all mid-range models)
Wi‑Fi for download and activation
Your PingRoam QR code from the web dashboard
A free eSIM slot (some devices support multiple eSIMs)
eSIM을 지원하는 Android 폰 (Pixel, Samsung Galaxy S/Z, Google 등 플래그십 모델, 저가 모델은 지원되지 않음)
Wi‑Fi 연결 (다운로드 및 활성화용)
PingRoam QR 코드 (웹 대시보드에서 확인)
무료 eSIM 슬롯 (일부 기기에서는 여러 eSIM을 지원)
Confirm first: eSIM compatibility check. Purchases are web-only; the app does not sell plans.
먼저 확인하세요: eSIM 호환성 확인. 구매는 웹 전용이며, 앱에서는 플랜을 판매하지 않습니다.
Open Settings → Network & internet → SIMs (or Internet).
Tap Add SIMs / Download a SIM instead / Add eSIM.
Choose Scan QR code and scan your PingRoam QR.
Confirm download, then name the plan (for example “Travel”).
Enable the eSIM and set it as the Mobile data SIM.
Turn off mobile data on your primary SIM to avoid roaming charges.
Settings → Network & internet → SIMs (또는 Internet) 메뉴 열기
Add SIMs / Download a SIM instead / 탭하기
Scan QR code 선택 후 PingRoam QR 코드를 스캔
다운로드 확인 후 플랜 이름 지정 (예: “Travel”)
eSIM을 활성화하고 Mobile data SIM으로 설정
기본 SIM의 모바일 데이터를 끄면 로밍 요금을 방지할 수 있습니다. 또한, 데이터 사용량을 절약하기 위해 Wi‑Fi를 우선으로 활용하고, 여행 중에는 모바일 데이터를 최소화하는 것이 좋습니다.
If QR fails, use Enter activation code with the SM-DP+ and code from your dashboard.
QR 코드 스캔에 실패하면 대시보드에서 제공하는 SM-DP+와 활성화 코드를 사용해 Enter activation code 입력. 이 경우 QR이 손상되었거나 네트워크 연결이 불안정할 수 있으니, 인터넷이 안정된 환경에서 다시 시도하세요.
Open Settings → Connections → SIM manager (wording may be Mobile networks).
Tap Add eSIM → Scan QR code.
Complete setup and turn the eSIM on.
Under preferred SIM for Mobile data, select the travel eSIM.
Keep the primary SIM for calls/SMS if Dual SIM is available.
Settings → Connections → SIM manager (혹은 Mobile networks) 메뉴 열기
Add eSIM → Scan QR code 탭하기
설정 완료 후 eSIM을 on 으로 전환
Mobile data에 대한 선호 SIM 선택 → 여행용 eSIM 선택
Dual SIM이 지원될 경우 기본 SIM을 통화/SMS용으로 유지. 이를 통해Calls와 SMS는 기존 번호로, 데이터는 eSIM으로 분리하여 사용이 용이합니다.
If QR fails, use Enter activation code with the SM-DP+ and code from your dashboard.
QR 스캔에 실패하면 대시보드에서 제공하는 SM-DP+와 활성화 코드를 사용해 Enter activation code 입력. 이 경우 QR이 손상되었거나 네트워크 연결이 불안정할 수 있으니, 인터넷이 안정된 환경에서 다시 시도하세요.
Prefer the travel eSIM for Mobile data.
Enable Data roaming on the eSIM only if the plan instructions say so.
Disable data roaming on the home SIM.
Test Maps before leaving the airport.
여행용 eSIM을 Mobile data용으로 우선 사용
플랜 안내에 따라 eSIM의 Data roaming을 활성화
기본 SIM의 데이터 로밍을 비활성화
공항을 나서기 전 Maps 앱을 테스트
iPhone users: How to install an eSIM on iPhone. Dual line habits: Dual SIM travel tips.
iPhone 사용자: iPhone에 eSIM 설치하는 방법. 듀얼 라인 습관: 듀얼 SIM 여행 팁.
| Problem | Fix |
|---|---|
| Add eSIM greyed out | Device or carrier may block eSIM; check compatibility |
| Download failed | Stable Wi‑Fi; retry; ensure QR unused |
| No data after landing | Preferred mobile data = eSIM; toggle Airplane Mode |
| Wrong network | Confirm destination matches the plan you bought |
| 문제 | 해결 방법 |
|---|---|
| Add eSIM 회색으로 비활성화됨 | 장치 또는 통신사에서 eSIM 차단 가능, 호환성 확인 |
| 다운로드 실패 | 안정된 Wi‑Fi 연결, 다시 시도, QR 코드 미사용 |
| 도착 후 데이터 없음 | 모바일 데이터 = eSIM; 비행기 모드 토글 |
| 잘못된 네트워크 | 구매한 플랜과 목적지가 일치하는지 확인 |
If QR fails, use Enter activation code with the SM-DP+ and code from your dashboard.
QR 스캔에 실패하면 대시보드에서 제공하는 SM-DP+와 활성화 코드를 사용해 Enter activation code 입력. 이 경우 QR이 손상되었거나 네트워크 연결이 불안정할 수 있으니, 인터넷이 안정된 환경에서 다시 시도하세요.
The model may lack eSIM hardware, or a regional SKU / carrier firmware disabled it. Check the manufacturer’s eSIM list and your carrier unlock status.
모델에 eSIM 하드웨어가 없거나, 지역별 SKU 또는 통신사 펌웨어가 비활성화될 수 있습니다. 제조사의 eSIM 목록과 carrier 해제 상태를 확인하세요.
Usually no. eSIM profiles are typically single-device. Contact support if you need a reissue after a phone change.
일반적으로 아니요. eSIM 프로필은 보통 단일 장치에만 적용됩니다. 폰을 교체하면 재발급을 원하면 지원에 문의하세요.
No. Keep it for your home number and SMS OTP while data runs on the eSIM.
아니요. 기본 번호와 SMS OTP용으로 물리 SIM을 유지하세요. 데이터는 eSIM에서 사용합니다.
Conceptually yes (scan QR / download SIM), but menu names differ. Search Settings for “eSIM” or “Add mobile plan”.
개념적으로는 동일합니다(QR 스캔/모바일 플랜 다운로드)지만, 메뉴 이름이 다릅니다. Settings에서 “eSIM” 또는 “모바일 플랜 추가”를 검색하세요.
Shop plans on Destinations
Learn basics in What is an eSIM?
플랜 구매: Destinations
기본 사항 학습: What is an eSIM?
데이터 사용량 계산에 대해 더 자세히 알고 싶다면 데이터 필요량 확인 페이지를 참고하세요. 또한, 호환성 확인은 eSIM 호환성 검증 페이지를 통해 진행할 수 있습니다.
